How to Use and Configure Outlook Shared Mailbox

Generally, admins setup a shared mailbox to improve collaboration between teammates and simplify email organization. This blog post explains how to use and configure Outlook shared mailbox with step-by-step instructions, as well as what to do when you face issues with the shared mailbox.

Outlook shared mailbox is a mailbox that can be accessed by multiple users in an organization. It allows teammates to coordinate and manage activities, and all the members can read and send emails from the mailbox, update shared calendars, etc.

The following are a few benefits of using Outlook shared mailboxes:

  • Multiple employees in an organization can share the responsibility of handling and replying to the emails of a single mailbox.
  • Outlook calendar and contacts information can be shared between multiple employees.
  • Admin can assign specific permissions to the members of shared mailbox for security and transparency.

How to Use Outlook Shared Mailboxes?

A shared mailbox automatically shows up in your Outlook profile once the Exchange admin adds you as a member of the mailbox. If you don’t see the shared mailbox, you can restart Outlook and check again.

Note: It may take a while for the shared mailbox to display in your Outlook profile.

If you don’t see the shared mailbox in your Outlook profile even after restarting Outlook, you can add it manually by following these steps:

  • Launch Outlook and go to File > Account Settings > Account Settings.
  • Open the Email tab, select your account, and then click Change.
  • Select More Settings > Advanced > Add.
  • Enter the email ID of the shared mailbox and click OK > OK.
  • Click Next > Finish and then close the window.

How to Send an Email from the Shared Mailbox?

Once you have successfully setup a shared mailbox, you can send emails by following these steps:

  • Launch Outlook and click New Email.
  • Click the From field at the top and select the shared mailbox email address. If you don’t see the shared email address, select Other email address and manually enter the email address. Then click OK.
  • Enter your message and click Send. Now, whenever you will create a new message, you will see the shared email address in the drop-down list in the From field.

How to Use Shared Calendar and Contacts?

Once admin has allowed you to use Outlook Shared Mailboxes, the shared calendar and contacts are automatically added to the appropriate lists in your Outlook profile.

To use calendar associated with the shared mailbox:

  • Go to Outlook and open the calendar view.
  • Then select the shared mailbox.

You need to know the following things about shared calendars:

  • When you create appointments in a shared calendar, whoever has access to the shared mailbox can see these appointments.
  • Members of shared mailbox can create, view, and edit appointments in the calendar.

Like in the case of shared calendar, the shared contacts are added to your My Contacts list automatically, once the admin allows you to use Outlook shared mailboxes. To access the shared contacts, follow these steps:

  • Launch Outlook and select People.
  • Under My Contacts, select the shared contacts folder.

How to Use Shared Mailbox in Outlook Web Access (OWA)?

If you want to open a shared mailbox in a web browser via OWA, you need to know how to setup a shared mailbox in your account manually. Following are the steps to setup a shared mailbox:

  • Sign in to your OWA account. If you are using Office 365, sign in to your account and launch Outlook.
  • Right-click on a folder or your mailbox in the navigation pane, and click Add shared folder
  • Enter the email ID of your shared mailbox in the dialog box and click Add.

Troubleshooting Shared Mailbox Issues

Outlook stores shared mailboxes data, like other mailbox items, locally in Outlook data file (OST). Sometimes, this OST file gets damaged or becomes inaccessible due to various reasons that include network connection issues, storage device failure, virus infection, etc. The problems with OST file may make your shared folder inaccessible or lead to syncing issues with the shared folder.

In such cases, you can delete and recreate the OST file to resolve the issues. However, if you’re not able to recreate the OST file or there are locally saved items in the file, you can recover the OST file data and save it in Outlook importable PST file by using a specialized OST to PST converter software such as Stellar Converter for OST. The software can easily convert an inaccessible or orphaned OST file into PST, in a few clicks.

Conclusion

Shared mailboxes in Outlook make it easy for small teams to manage and send emails from a common email address. These mailboxes also allow you to share contacts and calendars with the members. It’s easy to use and configure Outlook shared mailbox. You can access the shared mailbox almost instantly after the admin has made you a member.

Sometimes, you face some issues with your shared mailbox. This may usually happened due to problems with the OST file. In such a case, you can recreate the OST file to resolve the issue. If this doesn’t work, you can use an OST converter tool such as Stellar Converter for OST to save your OST file data in Outlook importable PST file.

How To Disable Blur on Windows 10 Sign-In Screen

Starting with Windows 10 “19H1” or build 18237, you have likely encountered a blurred background on the login screen. Some users like this feature and some don’t. If you’d like to change the blurred effect to a clear image, then you can do it in two ways:
1. Group Policy or Local Policy
2. Registry setting

Change using Group Policy or Local Policy:

  • Launch the Group Policy Editor > gpedit.msc
  • In Group Policy Editor, go to: Computer Configuration\Administrative Templates\System\Logon
  • Enable the policy option: Show clear logon background
  • Restart the computer for good measure

Change using Registry setting:

  • Launch the Registry editor (make sure you backup the registry prior to making any changes) > regedit.exe
  • Go to: HKEY_LOCAL_MACHINE\SOFTWARE\Policies\Microsoft\Windows\System
  • Create a new DWORD (32-bit) value: DisableAcrylicBackgroundOnLogon
  • Set the Value data to 1 to disable the blur effect on the login screen
  • Restart the computer

Now, you should have a clear login screen background.

Enable Windows 10 Administrator Account

This post is not to emphasize or promote the use of the local administrator account or provide such level of access to your users. IT Professionals and security experts will tell you that providing local administrator account privileges for end users is risky as it can introduce lots of issues such as ransomware attacks, malware infections, risk of compromised systems, and Pass-the-Hash attacks to name a few.

The local administrator account on a Windows 10 system is disabled by default. If you need to enable it for troubleshooting purposes or for some management tasks, you can do so in 3 ways.

Option 1: Computer Management

  • Click Start > search for Computer Management
  • Expand Local Users and Groups
  • Expand Users
  • Right-click on Administrator account
  • Uncheck Account is disabled box > click Apply and OK
  • Right-click Administrator account
  • Click on Set Password
  • Click on Proceed
  • Enter new password as desired
  • Confirm password > click OK

Option 2: Command Prompt

  • Click on Start > search for Command Prompt
  • Right-click and Run as Administrator
  • Type the following command and press enter:

net user “Administrator” /active:yes

Option 3: PowerShell

  • Click on Start > search for PowerShell
  • Right-click and Run as Administrator
  • Type the following command and press enter:

Get-LocalUser -Name “Administrator” | Enable-LocalUser

To disable the local Administrator account:

Get-LocalUser -Name “Administrator” | Disable-LocalUser

Finding and Removing Unused VMware Horizon View Replica Virtual Machines

vmware-vr-1

Purpose

This article provides steps to find one or more unused replicas in the datastore and to safely remove them.

Resolution

If the parent virtual machine or snapshot is changed in the pool settings, a new replica virtual machine is created. The previous replica becomes unused and is deleted after the recompose completes. The View composer automatically deletes the replica from vCenter Server and the Composer database. Under certain conditions, the replica virtual machine information may exist in the Composer database and the vCenter Server Inventory after any linked clone associated with the replica is deleted. This results in an unused replica.

Finding and removing unused replicas

To find and remove unused replicas:
  1. In vCenter Server or the server where the composer is installed, stop the VMware View Composer service.Note: When this service is down, no recompose, refresh, or provisioning operations occur. Use a convenient maintenance window.
  2. Click Start, type Services, and Press Enter.
  3. Click VMware View Composer Service.
  4. Click Stop.
  5. Click Start > Run, type cmd, and click OK. The command prompt opens.
Note: In the Windows Server 2008 machines, the command prompt must be run as an Administrator.
To run the command prompt as an Administrator:
  1. Click Start > Run, type cmd, and click OK. The command prompt opens.
  2. Hold Ctrl + Shift, and press Enter.
  3. Navigate to the View Composer install directory.
    • On a Windows 32-bit server, navigate to C:\Program Files\VMware\VMware View Composer.
    • On a Windows 64-bit server, navigate to C:\Program Files (x86)\VMware\VMware View Composer.
  4. Run the sviconfig.exe command with the FindUnusedReplica operation:

    SviConfig.exe -operation=FindUnusedReplica -DsnName=DSN_Name -Username=User_Name -Password=Password

    Where:

    • DSN_Name is the name of the compose database DSN
    • User_name is the user name of composer database owner
    • Password is the password of composer database ownerFor example:SviConfig.exe -operation=FindUnusedReplica -DsnName=ComposerDB -Username=sa -Password=secretNotes:
    • If the DsnName contains spaces, use quotes around the value.
    • If there are two composer databases on the server due to an older database, and the command is run against the incorrect database, the currently used replicas is moved to the unused folder as the old database does not recognize them.

    To determine the Composer DB DSN, user and password:

    1. In the vCenter Server hosting the Composer service, Click Start > Programs > Administrative Tools > Data Sources (ODBC).
    2. Click the System DSN tab.
    3. Click the Composer database entry. This is the value you enter for DsnName in the sviconfig command.
    4. Click Edit.
    5. The username is visible and should match the entry in the Composer configuration in the View Manager.
  5. If the command finds any unused replicas, they are listed in a new file created in the current directory ( unused-replica-*.txt).
  6. Unused replicas can be unprotected and moved to a unique folder with the parameter:-move=trueFor example:SviConfig.exe -operation=FindUnusedReplica -DsnName=ComposerDB -Username=sa -Password=secret -Move=trueNotes:
    • When using the move=true option, you receive warning pop-ups. These are safe to ignore.
    • Note the UnusedViewComposerReplicaFolder is created automatically if it does not exist, and unused replicas are moved to this folder.
  7. Open a vSphere Client and connect to vCenter Server.
  8. Click Inventory > VMs and Templates.
  9. Remove the replicas located at the UnusedViewComposerReplicaFolder.
  10. Start the VMware View Composer service.
Note: To view the help file for findUnusedReplicas:
  1. Click Start > Run, type cmd, and click OK. The command prompt opens and navigate to the View Composer install directory.
  2. Run this command:SviConfig.exe -operation=findUnusedReplica

Additional Information

See Also

MMSMOA 2018 – What To Pack

So, you’re headed to the Midwest Management Summit aka MMSMOA in Minneapolis, Minnesota from May 14-17, 2018 and with just a few days to go, now comes the dilemma of what to pack. Here are some suggestions from a conference veteran like me to help you with the task of packing.

What to Pack:

#1: Shoes – Comfortable shoes to wear during the conference is always a good thing to have. The nice thing about MMSMOA is that everything from sessions to expo hall is located in one general area which is in the Raddison Blu Hotel at The Mall of America. You have a very short walk from your hotel room, down the elevator and then just a few feet to get to all the session rooms. Most of your walking time will involve getting lunch or dinner, and to do some shopping at the massive Mall of America.

#2: Tech – Start collecting all the cables and charges you’ll need to keep your devices up and running at the conference. I recommend that you pack a portable battery charger for your smartphone(s), especially helpful when you are on-the-go and the power outlets are not easily accessible. It’s also advisable to pack a small power strip as power outlets can be scarce and you’ll make friends by sharing an outlet with others. This is also handy to use in your hotel room where the power outlets could be inaccessible due to their location (behind the bed, behind the entertainment system, etc). As for the portable battery chargers, I’m a big fan of the Anker brand for their ruggedness, quality, capacity, and great customer service when I need them.

#3: Clothes – The setting for the conference including the social events is casual. Pack comfortable clothes, but don’t pack too much since the conference is 4 days long. A few vendors will hand out free t-shirts, plus if you’re in a bind, the mall is conveniently located where you can quickly shop for something that you may need. You’ll definitely want to pack the essential items such as socks, underwear, a hoodie or sweatshirt for the cold conference rooms, a pair of jeans or casual pants, a few shirts, and whatever else you think is essential. Don’t forget your toiletries too.
** If you’re a dude, please for God sake leave the “manpris” at home! **

#4: Bottle / Mug – A traveling coffee mug if you’re a coffee drinker. Makes it easier to fill up on coffee and to travel from session to session without spilling. Plus, you’re helping safe the planet without using the disposable cups. You could also bring a water bottle as you should re-hydrate often.

#5: Cards – Bring along some business cards for networking purposes as well as to enter some cool contests organized by several vendors. I generally get my cards ordered in advance from Moo as I prefer the mini-card format and the high quality. You can also order some inexpensive business cards from VistaPrint but since it’s late in the game now to get some cards ordered in time for the conference, either make some at home with your personal printer or order some in-store at places like Staples.

#6: Social Media – Networking is one of the most important aspects of attending a conference such as MMSMOA. By now you have connected with several attendees and speakers via Twitter, Facebook, LinkedIn, WhatsApp, and/or Slack. If you haven’t, then it’s time you get on the social media band wagon to collaborate with others, make some new friends, help to enhance your career, don’t feel left out at the conference, and etc. One tip for helping with the process on location and to make the social media connections as smooth as possible is to print QR Codes of your favorite social media medium such as Twitter or Facebook. This way, you can easily whip out your QR Code when you meet someone that you’d like to connect and they can easily scan the code with their smartphone which will pull up your information with ease. Keep in mind, Twitter is preferred and encouraged to use at MMSMOA. Don’t forget to follow @MMSMOA on Twitter and use the hashtag #MMSMOA for all your tweets! You can follow me as well: @Hoorge.

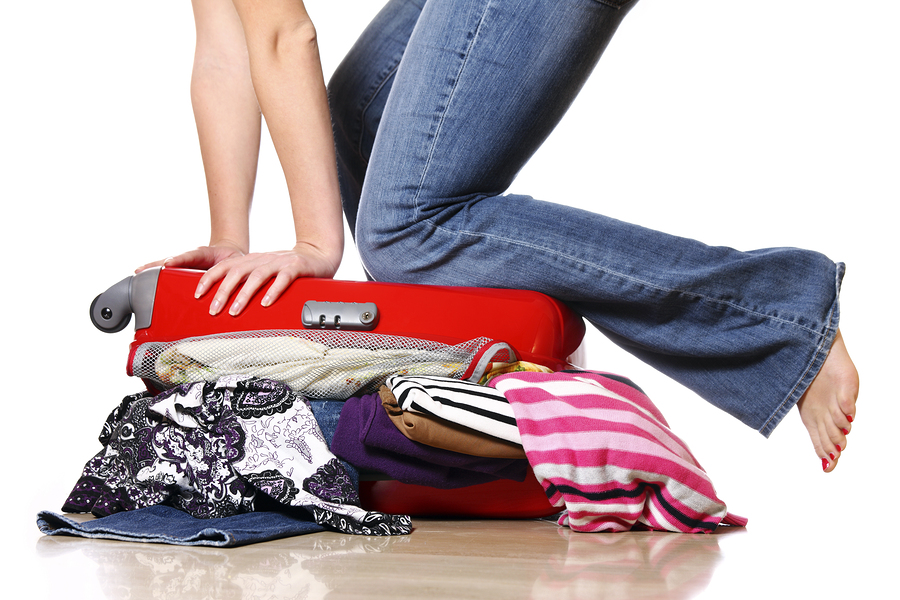
#7: Luggage – You should be good with your main suitcase or bag that you will pack with your clothes and the above items. Abundance of swag is not something you will collect at this conference, other than a few small trinkets and a couple of t-shirts. If you are planning to do some crazy shopping at the Mall of America, then an extra bag will come in handy.

#8: Laptop / Tablet – I generally travel with two laptops, one in case I need to jump in to handle some work issues back at the office, and the other as a personal device for daily use. Another reason for traveling with more than one laptop is in case one of them crashes for whatever reason and I still have something to manage my personal and work life. As far as note taking goes at the conference, I tend to use my iPhone as my primary device along with OneNote and Twitter apps. If you have been my follower on Twitter, you’ll know how much I use that medium for note taking, as I do that quite efficiently with unique hashtags for each session and other matters related to the conference. So, if you’re not following me, do so now. You’ll find me as @Hoorge on Twitter.

#9: Medical – If you take any prescription medication, make sure you bring those and preferably in their original packaging, and this is to avoid any issues with TSA at the airport. I travel with my CPAP machine for my sleep apnea, so I always make sure that I have the power cord, hose, mask, and other fun stuff that goes with the machine packed as a priority item the morning that I’m leaving for the airport. If you use spectacles and have an extra pair, bring that with you incase you encounter an unfortunate accident and break your main “four eyes”.

#10: Smartphone – I think it goes without saying that you won’t be traveling to the conference without your smartphone. To make your life a little easier, make sure you have enough free space to capture photos and videos during the week. Also, if you haven’t already done so, install apps such as OneNote for note taking; Twitter and Facebook for social media; OneDrive or Dropbox for uploading photos and videos to free up space on your device and for backup purposes; Microsoft Office Lens for capturing whiteboards, slide decks, business cards, and more; WhatsApp, Messenger and Slack for communication; and last but not least Untappd if you’re a beer lover.

#11: Camera – There are always some wonderful opportunities for capturing some great photos of the conference, so bring a camera with you. I would avoid bringing a large professional DSLR type camera with lenses and speedlights such as the Nikon D700 camera and the 24-70mm f/2.8 lens I often use for my freelance photojournalism work and event photography as it’ll be cumbersome to travel with and juggle during the conference. I tend to rely on my nifty iPhone for all of my photography and videography captures, and sometimes I bring along my Samsung NX300 camera for good measure. I’ll leave the selfie stick at your discretion.

#12: Fitness Trackers – No doubt there’s going to be some amount of walking during MMSMOA between the hotel and the mall, so don’t forget to pack your fitness tracker units like Fitbit, smart watches and their respective charging units to see if you break any step records. Find a few friends and do a step challenge for the week.

#13: Credit Cards / Cash – At this conference, you are on your own for breakfast, lunch, and dinner, so plan your finances accordingly. I would carry a small amount of cash for incidentals and tips or when you need to split a bill with others. Credit Cards is the way to go for everything else but beware and pay attention to your statements as fraudulent charges have been reported by attendees from past conferences such as Microsoft Ignite, sometimes even 6 months after the fact. If you want some peace of mind and avoid the hassle of compromised credit cards, get a couple of prepaid credit cards with limited amounts on them to use in restaurants, bars, and other establishments.

#14: Snacks – Each day at the conference can be long, tough, and super busy as you move from session to session and network with fellow attendees. Sometimes, it can be a challenge to spare some time for breakfast or lunch, so food items such as granola bars, health bars, nuts, and pop tarts can be extremely helpful. There is a Cariboo Coffee store just steps away from all the action in case you need to pickup some food and drinks.

#15: Sriracha and Beer – It goes without saying, I travel with my favorite hot sauce to spice up my conference center meals. How so you ask? Well, I often travel with the Sriracha2Go keychain container or the Sriracha2Go packets and they are so handy to have if you like to spice up your food on the go. As for beer, it’s a great way to network and try out some craft beer from all over the country and even abroad. Pack some of your local craft beer in your suitcase and enjoy them with some old and new friends. Don’t forget to double ziplock bag them and wrap them with your clothing to avoid breakage.

#16: Trinkets / Souvenirs – It’s never a bad idea to bring a few little trinkets from your local town / city / state / country such as keychains, stickers, fridge magnets, candy, etc to hand out or exchange with a fellow attendees. They become conversational items and everyone loves a little gift.

Hope this list will help you to pack for the conference and is helpful for things you may not have thought about. Good luck and see you soon in Minneapolis!

Follow (@Hoorge) on Twitter and join Tech Konnect on Facebook and Twitter (@TechKonnect) to stay current on technology related matters.

How To Obtain Computer Serial Number With PowerShell

To obtain the local computer serial number, use this one-liner PowerShell command:

get-wmiobject -Class win32_bios | select PSComputerName,SerialNumber

To obtain the serial number of a remote computer, use this one-liner PowerShell command (PSRemoting must be enabled:

get-wmiobject -ComputerName <name of computer> -Class win32_bios | select PSComputerName,SerialNumber

Configure PowerShell Remoting

To perform actions on remote computers using PowerShell, you’ll need to setup PowerShell Remoting. Here are the steps:

1. In a PowerShell CMD window that is running under the administrator context, run the following command:

Enable-PSRemoting –force

2. Configure WinRM to run automatically:

Set-Service WinRM -StartMode Automatic

3. Verify the start mode was set correctly and that it is currently running:

Get-WmiObject -Class win32_service | Where-Object {$_.name -like “WinRM”}

4. Configure so that all remote hosts are trusted:

Set-Item WSMan:localhost\client\trustedhosts -value *

5. Verify that the remote trusted hosts has taken effect:

Get-Item WSMan:\localhost\Client\TrustedHosts

Written by myITforum

How To Change GUID Partition Table to MBR

To change a GUID partition table disk into a master boot record disk using command line, follow the steps below.

1. Back up or move all volumes on the basic GUID partition table (GPT) disk you want to convert into a master boot record (MBR) disk.

2. Open an elevated command prompt (right-click Command Prompt, and then click Run as Administrator) and type diskpart.
If the disk does not contain any partitions or volumes, skip to step 6.

3. At the DISKPART prompt, type list disk. Make note of the disk number you want to delete

4. At the DISKPART prompt, type select disk <disknumber>

5. At the DISKPART prompt, type clean

6. At the DISKPART prompt, type convert mbr

And there you have it.

Review – Microsoft Systems Center Endpoint Protection Cookbook

System endpoint security is a critical aspect of modern day computing and we all have had our fair share in dealing with malware infections, and in some cases ransomware and cryptolocker attacks in our organizations. Microsoft has made great efforts in mitigating these security risks by providing a superior product called System Center Endpoint Protection (SCEP) for enterprises and Windows Defender which by default is included with Windows 10.

A System Center Configuration Manager (ConfigMgr or SCCM) or a Microsoft Intune administrator is familiar with SCEP as it is the way to administer and manage SCEP in the enterprise. However, there are many aspects and intricacies of SCEP one is not aware of and has not fully utilized, and should. While I was dealing with some SCEP updates and anti-malware policies in my organization, I came across this awesome book written by Nicolai Henriksen, a Microsoft MVP in Enterprise Mobility. I decided to write a non-biased review of this book and credit the wonderful information contained within it.

Nicolai’s SCEP cookbook is well written and vetted by another well respected Microsoft MVP in Enterprise Mobility, Ronni Pedersen, who I often interact with on social media on all things ConfigMgr. This book is shy of 200 pages and is laid out in eight easily digestible chapters and covers everything you need to know about SCEP from soup to nuts. You’ll learn how to plan and get started with SCEP, configuration, operations and maintenance, updates, security and privacy, configure advance protection, troubleshooting, and malware handling to name a few. It’s an information filled book with great tips and how to’s, and I particularly enjoyed how Nicolai included little segments throughout the book with tidbits such as “Getting ready….”, “How it works….”, and “How to do it….” which was perfect for my learning and understanding of the various concepts presented.

The Table of Contents of this book:

As a ConfigMgr admin who has been working with the product for a number of years including working with System Center Endpoint Protection, I have learned things that I didn’t know, picked up some tips and tricks, have a better insight and understanding of SCEP, and I have gained a great reference for the product. I highly recommend this book to all ConfigMgr and Intune admins. This book is available for purchase in Kindle and Paperback format on Amazon. If you would like to connect with Nicolai and have some feedback or suggestions, you’ll find him on Twitter as @nicolaitwitt.

Follow me (@Hoorge) on Twitter and join Tech Konnect on Facebook and Twitter (@TechKonnect) to stay current on technology related matters.