How To Install ConfigMgr Client On VDI Template

The installation of the ConfigMgr client on workstations and servers is pretty straight forward, and can be done manually, with Client Push, and Software Update Based client installation to name a few. However, it is not as simple when dealing with Windows VDI systems, where extra steps need to be taken to avoid duplicate ConfigMgr client GUIDs and certificates on cloned VDI systems. Below are the steps to follow.

On the master or template system:

  1. Install the ConfigMgr client. Ensure it is properly functioning and has all the necessary components and actions.
  2. Stop the SMS Host Service. This can be done by launching the Command Prompt (CMD) as Administrator and running the following command:
    net stop ccmexec
  3. Delete the SMSCFG.ini file from the Windows folder location. In Administrator CMD, run the following command:
    del %WINDIR%\SMSCFG.ini
  4. Delete the SMS Certificates. To do this, launch PowerShell as Administrator and run the following command:
    Remove-Item -Path HKLM:\Software\Microsoft\SystemCertificates\SMS\Certificates\* -Force
  5. Remove the Inventory Action ID 1 in WMI. You can run the following command:
    wmic /namespace:\root\ccm\invagt path inventoryActionStatus where InventoryActionID=”{00000000-0000-0000-0000-000000000001}” DELETE /NOINTERACTIVE
  6. Once the above steps have been completed, shutdown the master template, capture a snapshot, and provision the VDI systems. At this point, each VDI system will generate a unique ConfigMgr GUID and will function as expected.

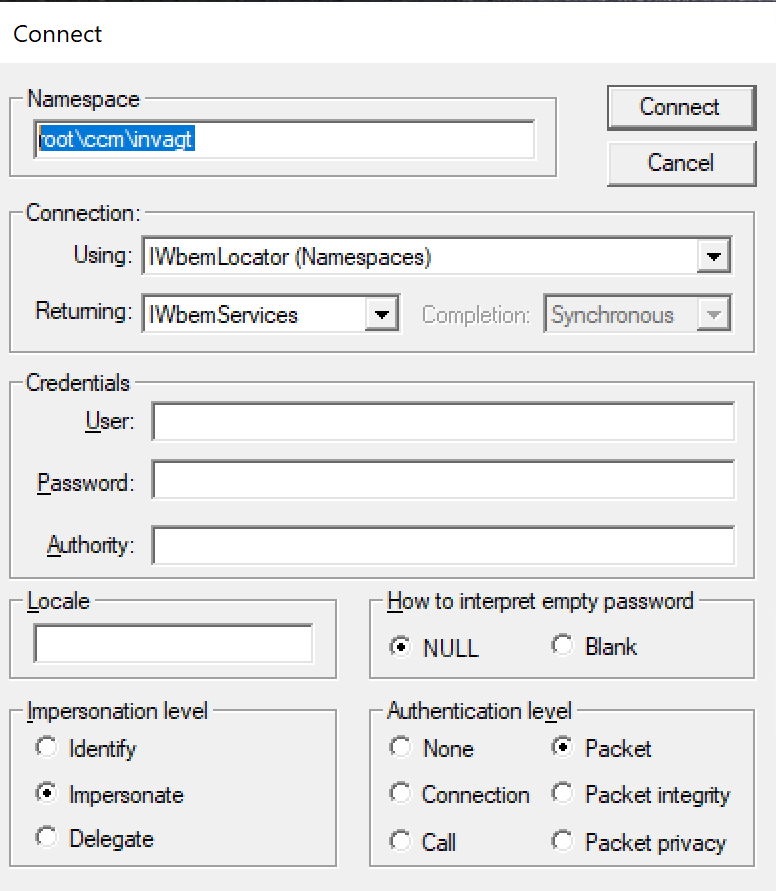
For step number 5, this can be achieved by using the wbemtest tool with the following steps:

  • Launch wbemtest as Administrator
  • Click Connect
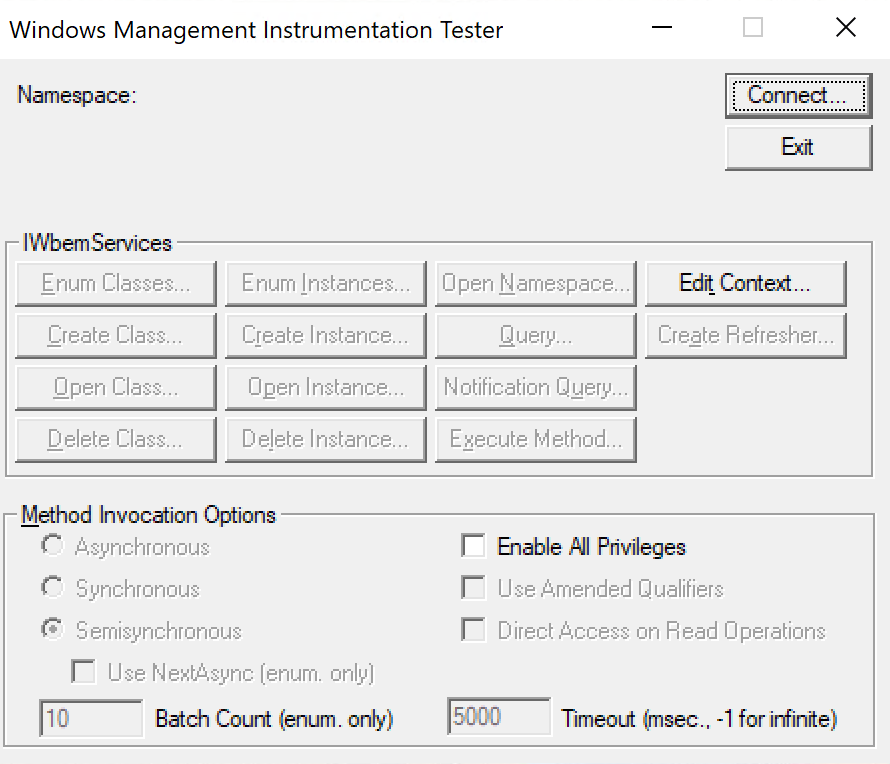
  • Change the Namespace field as root\ccm\invagt, and click Connect
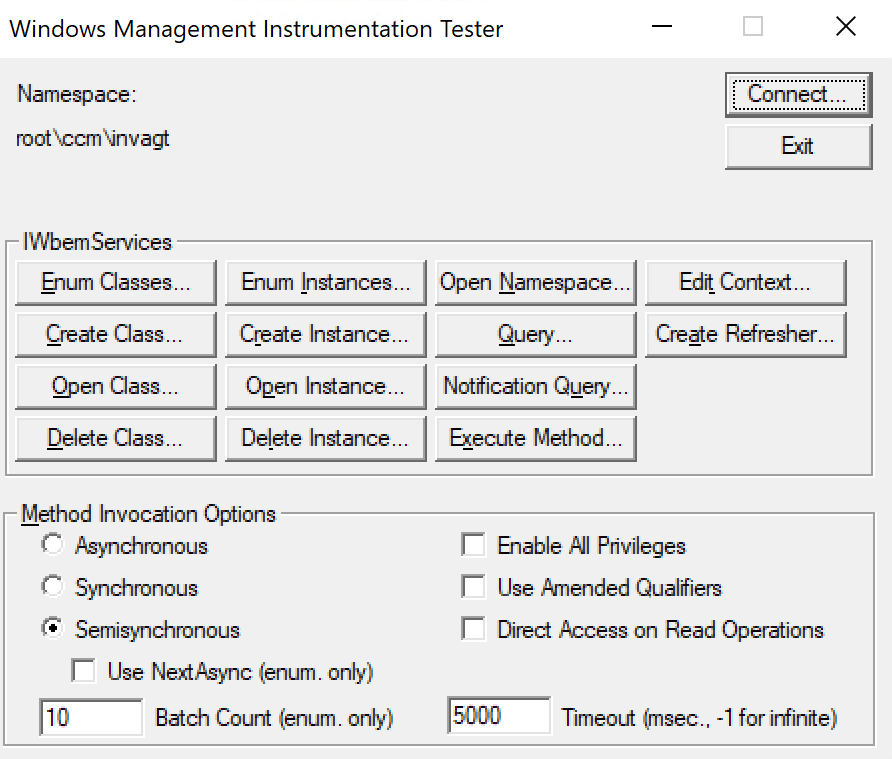
  • Click on Enum Classes
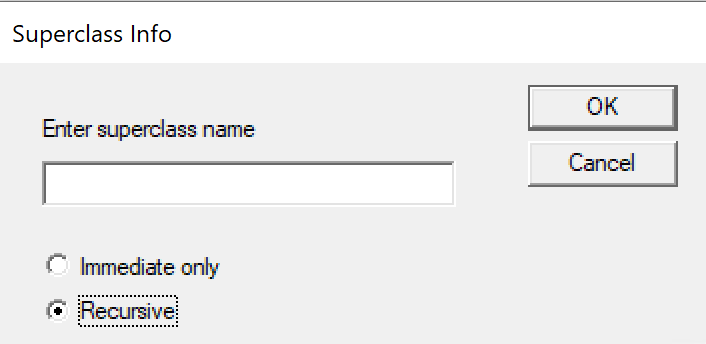
  • Select Recursive and click Ok
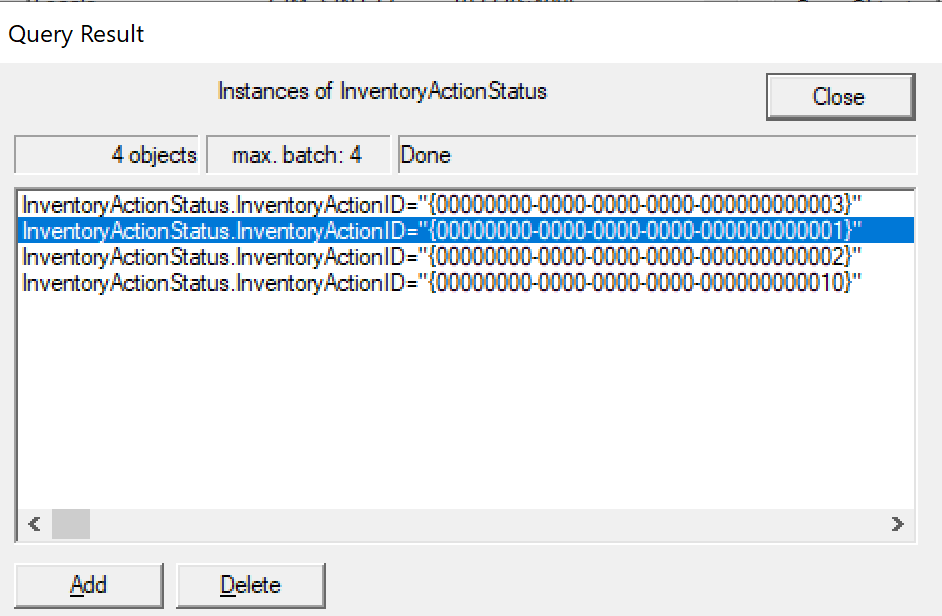
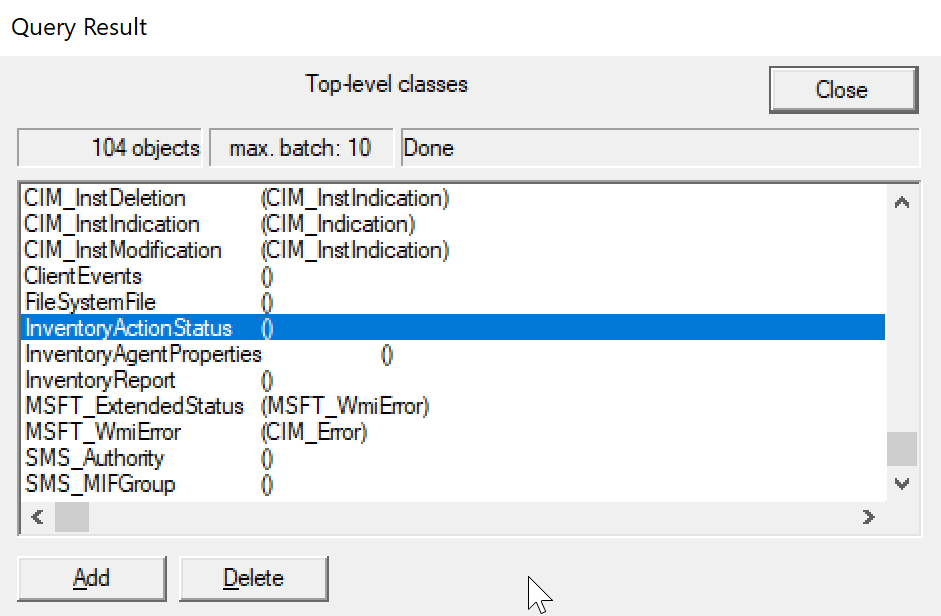
  • Scroll down and locate InventoryActionStatus, and double click
  • Click on the Instances button
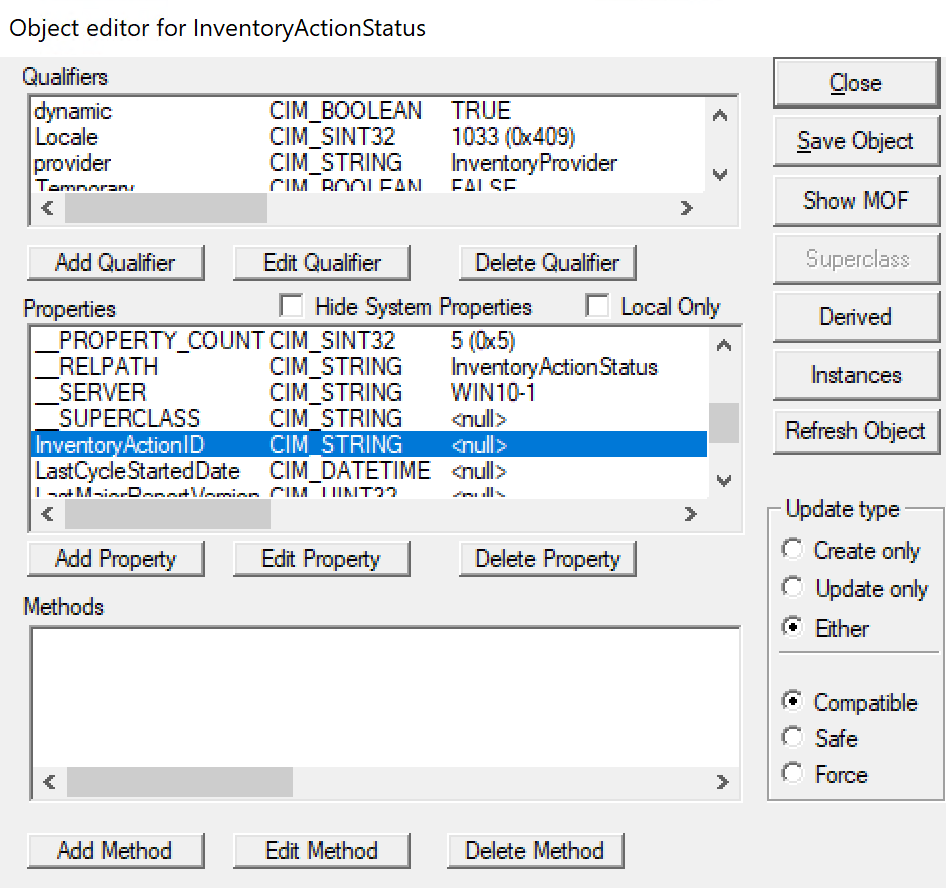
  • Select the Inventory GUID and click Delete

Finding and Removing Unused VMware Horizon View Replica Virtual Machines

vmware-vr-1

Purpose

This article provides steps to find one or more unused replicas in the datastore and to safely remove them.

Resolution

If the parent virtual machine or snapshot is changed in the pool settings, a new replica virtual machine is created. The previous replica becomes unused and is deleted after the recompose completes. The View composer automatically deletes the replica from vCenter Server and the Composer database. Under certain conditions, the replica virtual machine information may exist in the Composer database and the vCenter Server Inventory after any linked clone associated with the replica is deleted. This results in an unused replica.

Finding and removing unused replicas

To find and remove unused replicas:
  1. In vCenter Server or the server where the composer is installed, stop the VMware View Composer service.Note: When this service is down, no recompose, refresh, or provisioning operations occur. Use a convenient maintenance window.
  2. Click Start, type Services, and Press Enter.
  3. Click VMware View Composer Service.
  4. Click Stop.
  5. Click Start > Run, type cmd, and click OK. The command prompt opens.
Note: In the Windows Server 2008 machines, the command prompt must be run as an Administrator.
To run the command prompt as an Administrator:
  1. Click Start > Run, type cmd, and click OK. The command prompt opens.
  2. Hold Ctrl + Shift, and press Enter.
  3. Navigate to the View Composer install directory.
    • On a Windows 32-bit server, navigate to C:\Program Files\VMware\VMware View Composer.
    • On a Windows 64-bit server, navigate to C:\Program Files (x86)\VMware\VMware View Composer.
  4. Run the sviconfig.exe command with the FindUnusedReplica operation:

    SviConfig.exe -operation=FindUnusedReplica -DsnName=DSN_Name -Username=User_Name -Password=Password

    Where:

    • DSN_Name is the name of the compose database DSN
    • User_name is the user name of composer database owner
    • Password is the password of composer database ownerFor example:SviConfig.exe -operation=FindUnusedReplica -DsnName=ComposerDB -Username=sa -Password=secretNotes:
    • If the DsnName contains spaces, use quotes around the value.
    • If there are two composer databases on the server due to an older database, and the command is run against the incorrect database, the currently used replicas is moved to the unused folder as the old database does not recognize them.

    To determine the Composer DB DSN, user and password:

    1. In the vCenter Server hosting the Composer service, Click Start > Programs > Administrative Tools > Data Sources (ODBC).
    2. Click the System DSN tab.
    3. Click the Composer database entry. This is the value you enter for DsnName in the sviconfig command.
    4. Click Edit.
    5. The username is visible and should match the entry in the Composer configuration in the View Manager.
  5. If the command finds any unused replicas, they are listed in a new file created in the current directory ( unused-replica-*.txt).
  6. Unused replicas can be unprotected and moved to a unique folder with the parameter:-move=trueFor example:SviConfig.exe -operation=FindUnusedReplica -DsnName=ComposerDB -Username=sa -Password=secret -Move=trueNotes:
    • When using the move=true option, you receive warning pop-ups. These are safe to ignore.
    • Note the UnusedViewComposerReplicaFolder is created automatically if it does not exist, and unused replicas are moved to this folder.
  7. Open a vSphere Client and connect to vCenter Server.
  8. Click Inventory > VMs and Templates.
  9. Remove the replicas located at the UnusedViewComposerReplicaFolder.
  10. Start the VMware View Composer service.
Note: To view the help file for findUnusedReplicas:
  1. Click Start > Run, type cmd, and click OK. The command prompt opens and navigate to the View Composer install directory.
  2. Run this command:SviConfig.exe -operation=findUnusedReplica

Additional Information

See Also