How to Use and Configure Outlook Shared Mailbox

Generally, admins setup a shared mailbox to improve collaboration between teammates and simplify email organization. This blog post explains how to use and configure Outlook shared mailbox with step-by-step instructions, as well as what to do when you face issues with the shared mailbox.

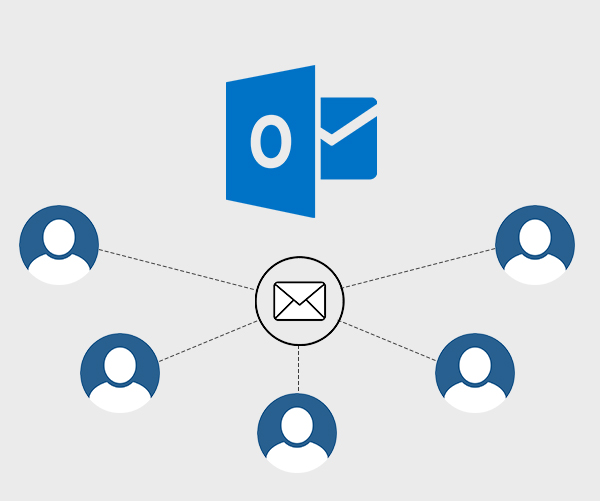
Outlook shared mailbox is a mailbox that can be accessed by multiple users in an organization. It allows teammates to coordinate and manage activities, and all the members can read and send emails from the mailbox, update shared calendars, etc.

The following are a few benefits of using Outlook shared mailboxes:

  • Multiple employees in an organization can share the responsibility of handling and replying to the emails of a single mailbox.
  • Outlook calendar and contacts information can be shared between multiple employees.
  • Admin can assign specific permissions to the members of shared mailbox for security and transparency.

How to Use Outlook Shared Mailboxes?

A shared mailbox automatically shows up in your Outlook profile once the Exchange admin adds you as a member of the mailbox. If you don’t see the shared mailbox, you can restart Outlook and check again.

Note: It may take a while for the shared mailbox to display in your Outlook profile.

If you don’t see the shared mailbox in your Outlook profile even after restarting Outlook, you can add it manually by following these steps:

  • Launch Outlook and go to File > Account Settings > Account Settings.
  • Open the Email tab, select your account, and then click Change.
  • Select More Settings > Advanced > Add.
  • Enter the email ID of the shared mailbox and click OK > OK.
  • Click Next > Finish and then close the window.

How to Send an Email from the Shared Mailbox?

Once you have successfully setup a shared mailbox, you can send emails by following these steps:

  • Launch Outlook and click New Email.
  • Click the From field at the top and select the shared mailbox email address. If you don’t see the shared email address, select Other email address and manually enter the email address. Then click OK.
  • Enter your message and click Send. Now, whenever you will create a new message, you will see the shared email address in the drop-down list in the From field.

How to Use Shared Calendar and Contacts?

Once admin has allowed you to use Outlook Shared Mailboxes, the shared calendar and contacts are automatically added to the appropriate lists in your Outlook profile.

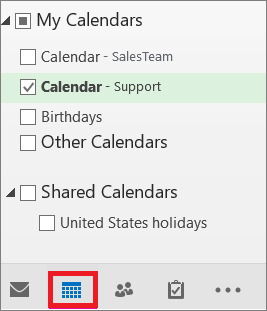
To use calendar associated with the shared mailbox:

  • Go to Outlook and open the calendar view.
  • Then select the shared mailbox.

You need to know the following things about shared calendars:

  • When you create appointments in a shared calendar, whoever has access to the shared mailbox can see these appointments.
  • Members of shared mailbox can create, view, and edit appointments in the calendar.

Like in the case of shared calendar, the shared contacts are added to your My Contacts list automatically, once the admin allows you to use Outlook shared mailboxes. To access the shared contacts, follow these steps:

  • Launch Outlook and select People.
  • Under My Contacts, select the shared contacts folder.

How to Use Shared Mailbox in Outlook Web Access (OWA)?

If you want to open a shared mailbox in a web browser via OWA, you need to know how to setup a shared mailbox in your account manually. Following are the steps to setup a shared mailbox:

  • Sign in to your OWA account. If you are using Office 365, sign in to your account and launch Outlook.
  • Right-click on a folder or your mailbox in the navigation pane, and click Add shared folder
  • Enter the email ID of your shared mailbox in the dialog box and click Add.

Troubleshooting Shared Mailbox Issues

Outlook stores shared mailboxes data, like other mailbox items, locally in Outlook data file (OST). Sometimes, this OST file gets damaged or becomes inaccessible due to various reasons that include network connection issues, storage device failure, virus infection, etc. The problems with OST file may make your shared folder inaccessible or lead to syncing issues with the shared folder.

In such cases, you can delete and recreate the OST file to resolve the issues. However, if you’re not able to recreate the OST file or there are locally saved items in the file, you can recover the OST file data and save it in Outlook importable PST file by using a specialized OST to PST converter software such as Stellar Converter for OST. The software can easily convert an inaccessible or orphaned OST file into PST, in a few clicks.

Conclusion

Shared mailboxes in Outlook make it easy for small teams to manage and send emails from a common email address. These mailboxes also allow you to share contacts and calendars with the members. It’s easy to use and configure Outlook shared mailbox. You can access the shared mailbox almost instantly after the admin has made you a member.

Sometimes, you face some issues with your shared mailbox. This may usually happened due to problems with the OST file. In such a case, you can recreate the OST file to resolve the issue. If this doesn’t work, you can use an OST converter tool such as Stellar Converter for OST to save your OST file data in Outlook importable PST file.

ConfigMgr Reporting Error – UserTokenSIDs LDAP Server Unavailable

I recently switched to using my new-ish laptop (Lenovo P1) for my day-to-day technical work and decided I should redo my test lab in Hyper-V, particularly for my ConfigMgr / MEMCM / Intune testing and troubleshooting stuff. While I have been actively using my ConfigMgr site in my lab, I didn’t pay much attention to the built-in reports until very recently, when I discovered I had an issue as all the reports produced an error.

The Component Status in the Monitoring node of the ConfigMgr console indicated no issues with the Reporting Services Point Role.

The Site Status was lit up nice and green and indicated all was working fine with my ConfigMgr site.

When a report is run from the ConfigMgr console or SSRS, the following error is produced (see image above):

The DefaultValue expression for the report parameter ‘UserTokenSIDs’ contains an error: The LDAP server is unavailable. (rsRuntimeErrorInExpression)

The full error is provided below:

System.Web.Services.Protocols.SoapException: The DefaultValue expression for the report parameter ‘UserTokenSIDs’ contains an error: The LDAP server is unavailable.
at Microsoft.ReportingServices.Library.ReportingService2005Impl.GetReportParameters(String Report, String HistoryID, Boolean ForRendering, ParameterValue[] Values, DataSourceCredentials[] Credentials, ParameterInfoCollection& Parameters)
at Microsoft.ReportingServices.WebServer.ReportingService2005.GetReportParameters(String Report, String HistoryID, Boolean ForRendering, ParameterValue[] Values, DataSourceCredentials[] Credentials, ReportParameter[]& Parameters)


Microsoft.ConfigurationManagement.ManagementProvider.SmsException
The DefaultValue expression for the report parameter ‘UserTokenSIDs’ contains an error: The LDAP server is unavailable.

Stack Trace:
at Microsoft.ConfigurationManagement.AdminConsole.SrsReporting.ParameterPresenter.GetParameters()
at Microsoft.ConfigurationManagement.AdminConsole.SrsReporting.ParameterPresenter.LoadParameters(IReport report, Collection`1 navigationParameters, IResultObject resultObject)
at Microsoft.ConfigurationManagement.AdminConsole.SrsReporting.ReportViewerPresenter.Worker_DoWork(Object sender, DoWorkEventArgs e)
at System.ComponentModel.BackgroundWorker.OnDoWork(DoWorkEventArgs e)
at System.ComponentModel.BackgroundWorker.WorkerThreadStart(Object argument)


I tried several troubleshooting steps including the following:

1. Uninstalled the Reporting role from ConfigMgr
2. Uninstalled the SQL Reporting Services
3. Reinstalled SQL Reporting Services
4. Reinstalled the Reporting role in ConfigMgr
5. Changed the registry key: “HKEY_LOCAL_MACHINE/SOFTWARE/Wow6432Node/Microsoft/ConfigMgr10/
AdminUI/Reporting/ReportBuilderApplicationManifestName” from the value “ReportBuilder_2_0_0_0.application” to “ReportBuilder_3_0_0_0.application”
6. Edited the file:
“C:\Program Files (x86)\Microsoft Configuration
Manager\AdminConsole\bin\Microsoft.ConfigurationManagement.exe.config” and changed the 2 to a 3 in the two locations:
<add key=”10.0″ value=”ReportBuilder_3_0_0_0.application”/>
<add key=”DEFAULT” value=”ReportBuilder_3_0_0_0.application”/>
7. Checked accounts including the service account for SQL reporting

None of the above steps helped fix the UserTokenSIDs issue. I searched high and low on Google / Bing and did not discover anything regarding “LDAP server is unavailable” specifically relating to UserTokenSIDs. I finally got the big guns out and contacted my close friend, Garth Jones, who is a known industry expert with SQL and SSRS. He is a Microsoft MVP and also owns a company called Enhansoft which provides a subscription service for all things reports, which extends the reporting capabilities in ConfigMgr. Enhansoft also provides a free report as a giveaway each month.

RESOLUTION:

With Garth’s help, the issue was quickly discovered and fixed quite easily. Bottom line is that I was using a local administrator account (CM01\Administrator) to login to my ConfigMgr server as opposed to using a Domain account (Dhalico\Harjit) with the necessary privileges. FYI, “Dhalico” is my domain.
1. Added the Dhalico\Harjit account in the ConfigMgr console under
Administration > Overview > Security > Administrative Users (see image below)
2. Provided “Full Administrator” security role
3. Logged on to the ConfigMgr server as “Harjit” and tested running reports
4. Success! And Thank you Garth! 🙂

Windows PXE Boot Issues – KB4493467 (April 9, 2019)

Microsoft has acknowledged an issue with PXE boot affecting Windows 8.1 and Windows Server 2012 R2 systems caused by a Security-Only update (KB4493467) released on April 9, 2019.

The Issue:

After installing this update, there may be issues using the Preboot Execution Environment (PXE) to start a device from a Windows Deployment Services (WDS) server configured to use Variable Window Extension. This may cause the connection to the WDS server to terminate prematurely while downloading the image. This issue does not affect clients or devices that are not using Variable Window Extension.

The Workaround:

To mitigate the issue, disable the Variable Window Extension on WDS server using one of the following options:

Option 1:
Open an Administrator Command prompt and type the following:

Wdsutil /Set-TransportServer /EnableTftpVariableWindowExtension:No

Option 2:
Use the Windows Deployment Services UI.

  1. Open Windows Deployment Services from Windows Administrative Tools.
  2. Expand Servers and right-click a WDS server.
  3. Open its properties and clear the Enable Variable Window Extension box on the TFTP tab.

Option 3:
Set the following registry value to 0:

HKLM\System\CurrentControlSet\Services\WDSServer\Providers\WDSTFTP\EnableVariableWindowExtension”.

Restart the WDSServer service after disabling the Variable Window Extension.

Microsoft is working on a resolution and will provide an update in an upcoming release.

Fix WordPress “Destination Folder Already Exists”Issue

I encountered an issue with my WordPress hosted site when I was attempting to install a plugin, in this case the WP Statistics plugin. I know I had previously installed this plugin but it did not show up in my installed plugin list in the WordPress Admin dashboard. The installation fails with an error: “Installation failed: Destination folder already exists.”

When you install a WordPress theme or plugin, WordPress will extract and copy the folder from a zip file into the wp-content/themes or wp-content/plugins directory. If the folder already exist, then WordPress is unable to copy the files and therefore generates the error. This can happen if the theme or plugin files that are already installed are missing or corrupted.

Here’s the fix for this issue:

  • Use a FTP client such as FileZilla, and connect to your WordPress site.
  • Drill down into the wp-content/plugins directory and delete the plugins folder which you are having issues with. In my case the WP Statistics plugin folder.
  • Once the folder is deleted, go back to your WordPress admin site and reinstall the plugin. You should see a successful installation and at which point, you can activate the plugin and configure the settings if necessary.

ConfigMgr Guidance For SQL CE Levels

What is Cardinality Estimation or SQL CE Level?
The Cardinality Estimator is a SQL Server Query Processor component that is responsible for predicting the number of rows that the query will return. Microsoft provides some great documentation about SQL CE which you can read more on Microsoft Docs.

As for how SQL CE works and it’s importance with ConfigMgr, Umair Khan of Microsoft has shared a great blog post explaining the details, which you can read more here:
https://blogs.technet.microsoft.com/umairkhan/2019/01/28/configmgr-current-branch-1810-guidance-for-the-sql-ce-levels-with-various-sql-versions

Finding and Removing Unused VMware Horizon View Replica Virtual Machines

vmware-vr-1

Purpose

This article provides steps to find one or more unused replicas in the datastore and to safely remove them.

Resolution

If the parent virtual machine or snapshot is changed in the pool settings, a new replica virtual machine is created. The previous replica becomes unused and is deleted after the recompose completes. The View composer automatically deletes the replica from vCenter Server and the Composer database. Under certain conditions, the replica virtual machine information may exist in the Composer database and the vCenter Server Inventory after any linked clone associated with the replica is deleted. This results in an unused replica.

Finding and removing unused replicas

To find and remove unused replicas:
  1. In vCenter Server or the server where the composer is installed, stop the VMware View Composer service.Note: When this service is down, no recompose, refresh, or provisioning operations occur. Use a convenient maintenance window.
  2. Click Start, type Services, and Press Enter.
  3. Click VMware View Composer Service.
  4. Click Stop.
  5. Click Start > Run, type cmd, and click OK. The command prompt opens.
Note: In the Windows Server 2008 machines, the command prompt must be run as an Administrator.
To run the command prompt as an Administrator:
  1. Click Start > Run, type cmd, and click OK. The command prompt opens.
  2. Hold Ctrl + Shift, and press Enter.
  3. Navigate to the View Composer install directory.
    • On a Windows 32-bit server, navigate to C:\Program Files\VMware\VMware View Composer.
    • On a Windows 64-bit server, navigate to C:\Program Files (x86)\VMware\VMware View Composer.
  4. Run the sviconfig.exe command with the FindUnusedReplica operation:

    SviConfig.exe -operation=FindUnusedReplica -DsnName=DSN_Name -Username=User_Name -Password=Password

    Where:

    • DSN_Name is the name of the compose database DSN
    • User_name is the user name of composer database owner
    • Password is the password of composer database ownerFor example:SviConfig.exe -operation=FindUnusedReplica -DsnName=ComposerDB -Username=sa -Password=secretNotes:
    • If the DsnName contains spaces, use quotes around the value.
    • If there are two composer databases on the server due to an older database, and the command is run against the incorrect database, the currently used replicas is moved to the unused folder as the old database does not recognize them.

    To determine the Composer DB DSN, user and password:

    1. In the vCenter Server hosting the Composer service, Click Start > Programs > Administrative Tools > Data Sources (ODBC).
    2. Click the System DSN tab.
    3. Click the Composer database entry. This is the value you enter for DsnName in the sviconfig command.
    4. Click Edit.
    5. The username is visible and should match the entry in the Composer configuration in the View Manager.
  5. If the command finds any unused replicas, they are listed in a new file created in the current directory ( unused-replica-*.txt).
  6. Unused replicas can be unprotected and moved to a unique folder with the parameter:-move=trueFor example:SviConfig.exe -operation=FindUnusedReplica -DsnName=ComposerDB -Username=sa -Password=secret -Move=trueNotes:
    • When using the move=true option, you receive warning pop-ups. These are safe to ignore.
    • Note the UnusedViewComposerReplicaFolder is created automatically if it does not exist, and unused replicas are moved to this folder.
  7. Open a vSphere Client and connect to vCenter Server.
  8. Click Inventory > VMs and Templates.
  9. Remove the replicas located at the UnusedViewComposerReplicaFolder.
  10. Start the VMware View Composer service.
Note: To view the help file for findUnusedReplicas:
  1. Click Start > Run, type cmd, and click OK. The command prompt opens and navigate to the View Composer install directory.
  2. Run this command:SviConfig.exe -operation=findUnusedReplica

Additional Information

See Also

PCoIP connections to VMware Horizon View 5.1.x / 6.1 Desktops With Multiple Network Adapters Fail

PCoIP connections to VMware Horizon View 5.1.x / 6.1 desktops with multiple network adapters fail (2062604)

Symptoms

  • Attempting to connect to Horizon View desktops with multiple network adapters fail.
  • You see errors similar to:
    • Unable to launch from Pool <pool> for user <domain/user>: There were no machines available that reported protocol [PCoIP] as ready
    • The Display Protocol For this Desktop is currently not available
    • The connection to the remote computer ended
Note: The issue can also be observed when connecting to View desktops having single network adapter.

Resolution

To resolve this issue, configure the subnet that the View Agent uses by setting the value for the subnet mask registry in Parent Virtual Machine.
Warning: This procedure modifies the Windows registry. Before making any registry modifications, ensure that you have a current and valid backup of the registry and the virtual machine. For more information, see Microsoft KB article 136393.
Note: The preceding link was correct as of June 17, 2015. If you find a link is broken, provide a feedback and a VMware employee will update the link.
To open the Windows Registry:
  1. Click Start > Run, type regedit, and click OK.
  2. Go to the registry key – HKEY_LOCAL_MACHINE\software\vmware inc\vmware vdm\node manager\subnet.

    For View 6.1 – Go to the registry key HKEY_LOCAL_MACHINE\software\vmware inc\vmware vdm \IpPrefix
  3. Set the value to n.n.n.n/m (REG_SZ). Note: where n.n.n.n is the TCP/IP subnet and m represents the number of bits in the subnet mask.
For more information:

Source: http://kb.vmware.com/selfservice/microsites/search.do?language=en_US&cmd=displayKC&externalId=2062604

Windows 7 Network Controller Issues – KB4338818 (July 2018)

The July 2018 Windows Updates for Windows 7 SP1 and Windows Server 2008 R2 SP1 introduces a bug that could cause the network interface controller to stop working. The update referenced is KB4338818.

In case your systems run into this issue, the workaround from Microsoft is to do the following:

Please use your best judgement and evaluate the risks of applying this update to your Windows 7 SP1 and Windows Server 2008 R2 systems.

** Update **
According to an IT Pro who opened a support case with Microsoft, this is the information provided at this time:

“Regarding the known issue in the July monthly rollup about the network interface controller that will stop working. We are still looking at the data gathered from multiple customers and we do not have a list third party software that is causing the issue. What we do know until now, is that the issue is reproducing mainly on VM over VMware.”

Fix For Error: Failed To Process Configuration Manager Update 0x87d20b15

With the release of version 1710 for System Center Configuration Manager Current Branch on November 20, 2017, I pursued to update my ConfigMgr 1706 site to take advantage of some of the exciting new features, which you can read more here! Use this PowerShell script to enable the early update ring for ConfigMgr 1710.

I tested the update in my test lab and the upgrade to v1710 worked just fine. As usual with my production environment, I always run the prerequisite checker to make sure nothing is flagged as an issue, which in my case all was fine with green checkmarks. However, the actual installation of the update failed on the Installation step for “Upgrade ConfigMgr database” as seen in the screen capture above. The description for the error indicates: [Failed]: Upgrading ConfigMgr database. Check cmupdate.log for details.

The following is an error was seen in the cmupdate.log: Failed to apply update changes 0x87d20b15

I located a blog post by my friend Anoop dated from October 2016 referencing a similar error code where he points to providing the NT Authority/System account in SQL with the sysadmin security role, however that was not the cause of my upgrade failure and the security roles were already defined correctly. The following TechNet thread was a dead end as well.


My post on Twitter as seen above caught the attention of another friend of mine, David James, Director of Engineering for ConfigMgr at Microsoft, who with his team were able to pinpoint the problem in no time at all and quickly provided a solution which resolved my ConfigMgr 1710 upgrade installation hang up. Thanks David and to the ConfigMgr team! The gist of the problem is that my environment had an old compatibility level 100 set for the SQL Server database for the CM_XXX database, and you can find this referenced in the cmupdate.log file. Changing it to 110 fixed the compatibility level needed for ConfigMgr 1710.

Run the following query in SQL Management Studio (please change XXX to your ConfigMgr Site Code) and retry the installation via the Update and Servicing node in the ConfigMgr Admin Console. This also addresses the issue where TRY_CONVERT is not recognized as a built-in SQL function:

ALTER DATABASE CM_XXX SET COMPATIBILITY_LEVEL = 110

SUCCESS!!

** Additional Mention **

Check out this blog post, “In Telemetry We Trust?” written by a friend and fellow ConfigMgr admin, Peter Egerton, who shares a similar experience and the positive nature of telemetry data especially in the ConfigMgr space.

How To Fix: Bitlocker Recovery Key Prompts On Every Reboot

windows-10-bitlocker-featured

There are few reports of users having Bitlocker issues following the October 2016 patches.

The issue: On every reboot, the Bitlocker recovery key is required which is quite disruptive and cumbersome. As a workaround in order to solve this issue, the following steps can be taken:

On the next reboot and once in Windows, reset Bitlocker by disabling and re-enabling it.
In administraive command prompt, do the following:
manage-bde -protectors c:-disable
then do this:
manage-bde -protectors c:-enable

At this time, I’m not certain on which patch is causing the issue but I wanted to share this info to help. You can also discuss in this TechNet post.

Follow (@Hoorge) on Twitter and join Tech Konnect on Facebook and Twitter (@TechKonnect) to stay current on technology related matters.